|
Step One: Layout real estate post components that were included in the box. At a minimum you should have a post, cross arm, cap, stake and key. There may be other upgrades such as bases, rider clips, etc. depending on your order. |
 |
 |
Step Two: Using a hammer, drive the real estate post stake into ground. Make sure that stake is straight while hammering. If you are in an area where the ground is difficult see the great tip below to make the installation a breeze! |
 |
Step Three: The stake should be driven downwards until the bottom plate is flush with the ground. The bottom plate should be facing forward in the desired direction of the real estate post arm. |
|
Step Four: Slide the vinyl real estate post over the stake until it touches the ground. The holes on the post should be at the top and facing in the desired direction of the sign arm. |
 |
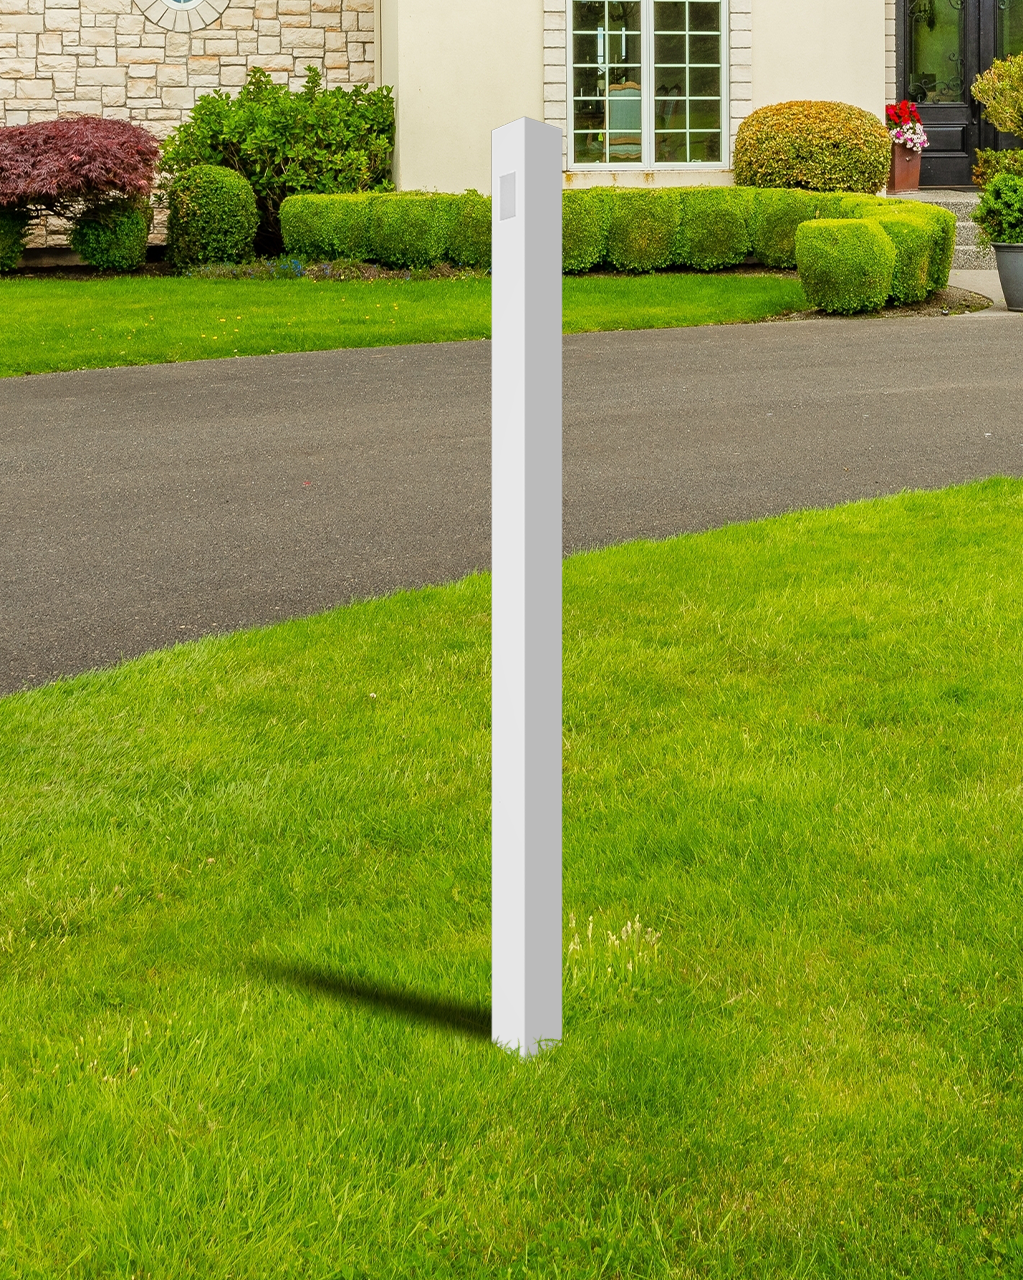 |
Step Four (continued): The picture to the left shows a post correctly installed. Note that the post holes are at the top, facing forward and the post is level. |
|
Step Four (continued): Slide the vinyl real estate post arm into the post. Make sure that the slots are facing up and the nylon grommets for the eye hooks are facing out. Slide the arm through the holes until the slots are aligned on the inside of the post. |
 |
 |
Step Five: Slide the key into the slots of the real estate post arm until it locks in place. This will secure the arm. |
|
Step Six: Slide the post cap onto the top of the real estate post. |
 |
 |
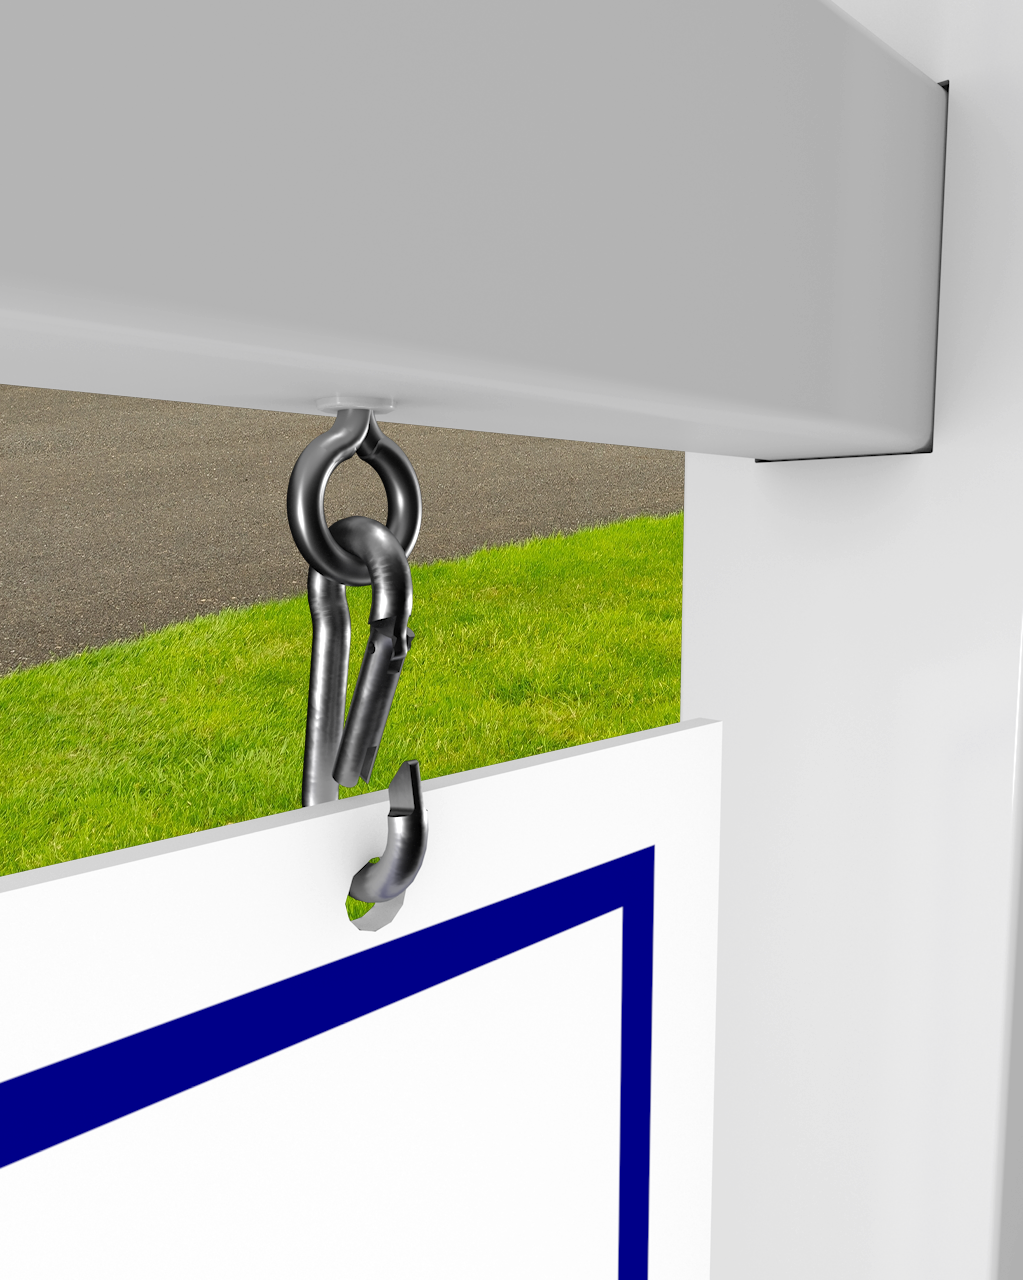
Step Seven: Screw the eye bolts into the grommets. Choose the hole placements based on the size of you sign. |
|
Step Eight: Attach your real estate sign to the sign arm using the stainless steel carabiner sign clips. |
 |
 |
Step Nine: Attach rider to top of sign arm. This applies to orders where the optional rider clips are selected by the customer. |
|
You are finished! Our team is available by phone or email from 8:30 - 5:30 EST to answer any questions you may have! |
 |